Knowing how to turn on logging is essential to being able to debug any issues that may arise. IBM support may even ask you to give them log files if you have to go that far. Configuring logging is much easier in Maximo 7 because you can use the front end GUI instead of modifying the logging.properties files in Maximo 6. So to enable logging, follow these steps.
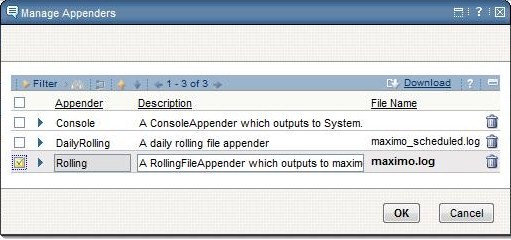
First, go to the Logging application in Maximo 7, Go To -> System Configuration -> Platform Configuration -> Logging. Then go to Select Action -> Manage Maximo Root Logger. Click on the book icon next to the Appenders field. Check the Rolling check box and click OK.

Go to Select Actions -> Apply Settings
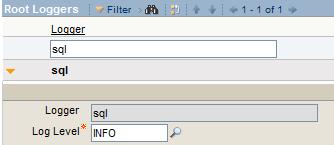
To log all SQL statements the SQL logger in the logging app should be set to INFO. Do this by filtering the list for ‘sql’ and modifying like so.

Go to Select Actions -> Apply Settings
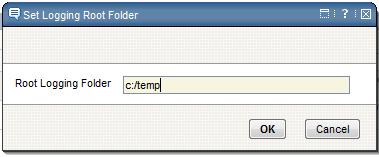
Next go to Select Actions -> Set Logging Root Folder. Here you enter a valid path in the Set Logging Root Folder field where you want the output log file to reside. It can be anywhere you want.

Go to Select Actions -> Apply Setting.
Turn on mxe.mbocount if there is a memory issue. Go to System Properties application bring up mxe.mbocount property, enter 1 in the Global value and select the checkbox next to the property name. Go to Select Actions -> Live Refresh
Now we can test the logging capability. Go to Workorder Tracking module and create a work order and save the record.
Check and ensure that a maximo log has been created in the directory specified in the “Logging Root Folder” in the logging module.
Also check SQL statements have been recorded in the log.
Finally, be sure to turn off logging when you are completed especially on a production environment because it can create very large log files and it will impact performance.


