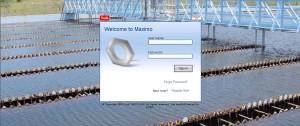
Goal: Before / After
Time:
2 hours but depends on your back-up procedures, image manipulation time, and time required to rebuild and redeploy the Maximo EAR file
Prerequisites
- You will need image manipulation software like Adobe Photoshop, GIMP, Paint, etc…
- You will need Administrator Access to the Maximo Server
- You will need to back up Maximo, the database, and existing image files before you proceed (I can’t be held responsible for your system)
- You will need to know how to rebuild and redeploy the Maximo EAR file
Procedure
- Pick a single image you would like to see as your login screen. It’s best to use an image that doesn’t have features in the center that will be obscured by the sign in box
- Using image manipulation software make three copies of the picture you choose to use with the following file names, dimensions, and extensions – note smaller file sizes (image compression) equal quicker load times.
- On your Maximo Server browse to the following location. Note your file path may be slightly different depending on your configuration.
- a) C:/IBM/SMPPROD/maximo/applications/maximo/ maximouiweb/webmodule/webclient/login/images
- b) If you’ve browsed to the correct folder you will see the following files
- ge_login_bkgnd.jpg
- ge_login_bkgnd.png
- ge_login_bkgnd_ev.png
- c)

- d) Create a new folder and title it Original Login Images
- e) Move the three images identified in 3) b above into the folder Original Login Images
- f) Move the pictures you chose for your new background into the file path identified above in 3) a
- C:/IBM/SMPPROD/maximo/applications/maximo/ maximouiweb/webmodule/webclient/login/images
- Now shut down the Maximo server
- Rebuild and redeploy the Maximo EAR file
- Start up the Maximo server and if everything went correctly you should see your new login screen


